Bighand Go - Apple Guide
How to approve on a mobile phone
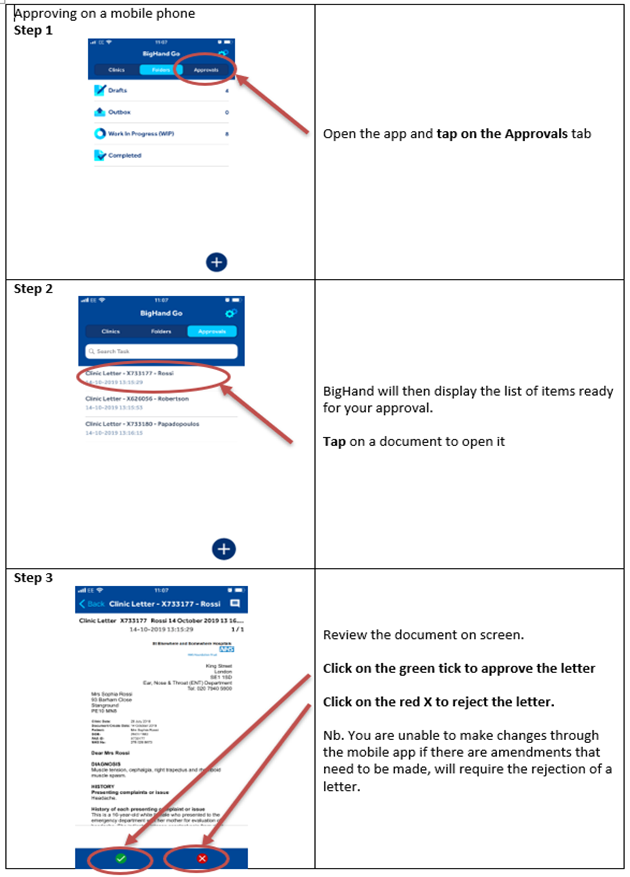
Step 1
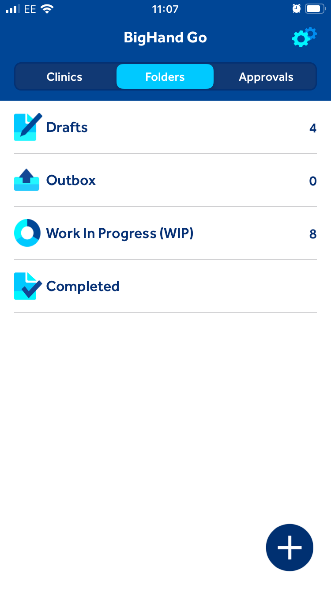
Open the app and tap on the Approvals tab
Step 2
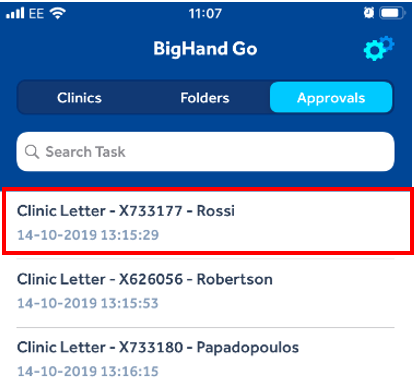
BigHand will then display the list of items ready for your approval.
Tap on a document to open it
Step 3
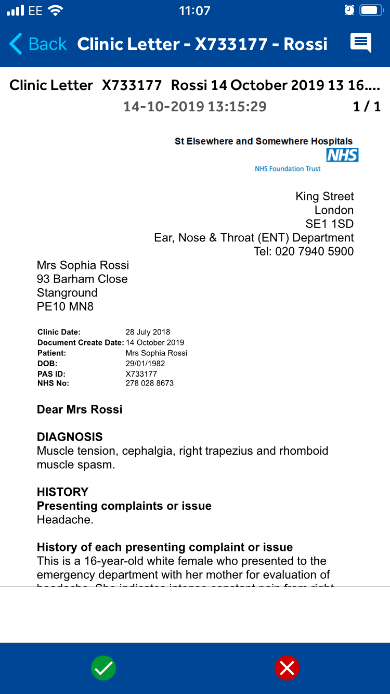
Review the document on screen.
Click on the green tick to approve the letter
Click on the red X to reject the letter.
Nb. You are unable to make changes through the mobile app if there are amendments that need to be made, will require the rejection of a letter.
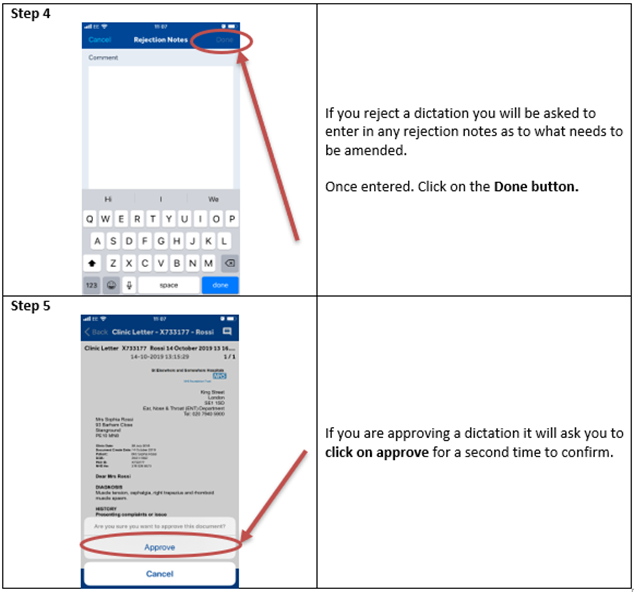
Step 4
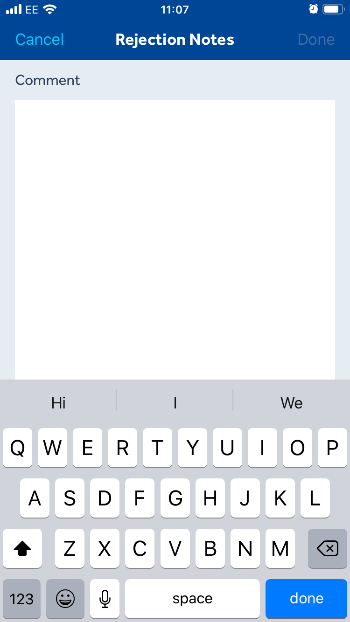
If you reject a dictation you will be asked to enter in any rejection notes as to what needs to be amended.
Once entered. Click on the Done button.
Step 5
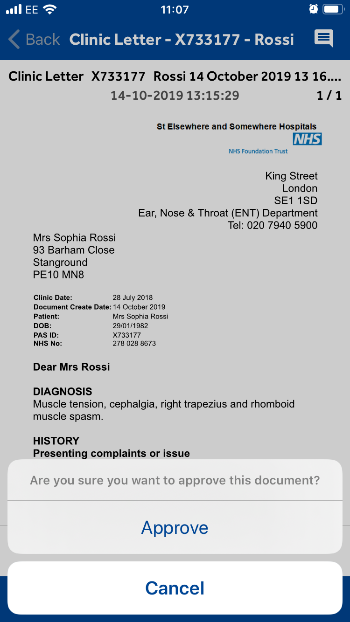
If you are approving a dictation it will ask you to click on approve for a second time to confirm.
How to use clinic builder to create letters
Step 1
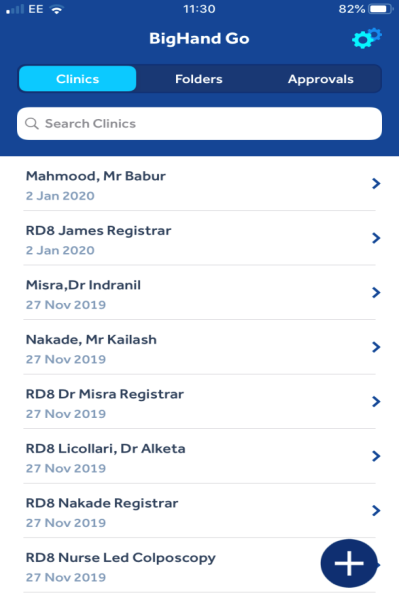
Go to the Settings cog and choose ‘Preferences’
You can now change any personal preferences
Step 2
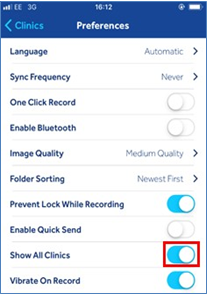
In order to view all clinician names and clinics ‘Show All Clinics’ (in Preferences) must be enabled
Step 3
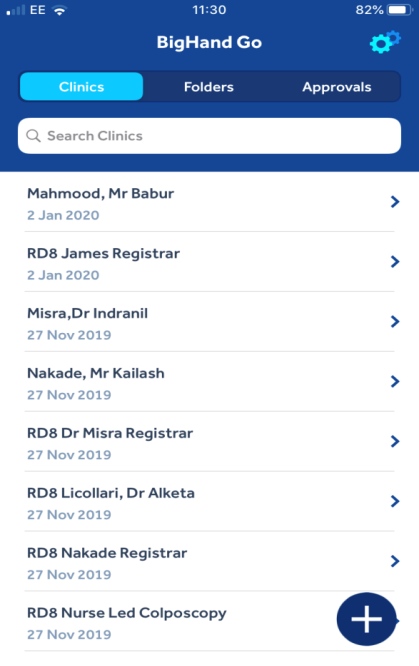
Select the ‘Clinics’ tab on the home screen, type the clinician surname into the ‘Search Clinics’ bar – then ‘Search’ (bottom right) and scroll to find the required clinician name and clinic date.
Tap to select
Step 4
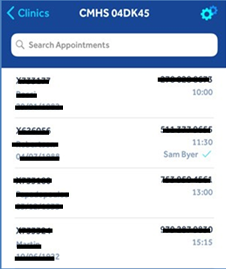
Scroll through to locate the patient you wish to dictate on.
Tap to select
Step 5
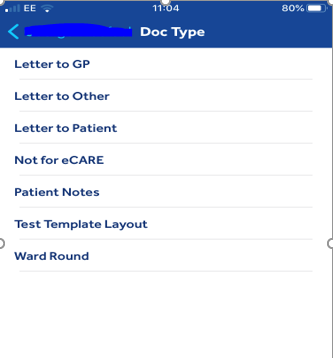
Choose the Doc Type
Step 6
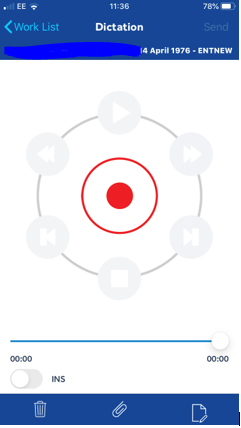
Step 7 (optional)
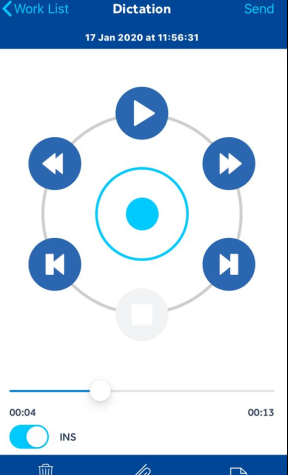
Start recording by tapping the red dot
Stop, rewind and fast forward can all be selected once the initial recording is created.
There is the option to insert further recording to your dictation. Turn on the ‘INS’
button to activate ‘Insert Mode’. The red dot will change to blue, play your dictation from the
beginning and stop where you wish to insert. Tap the blue dot to start recording and tap again to stop.
Tap ‘Send’
Step 8
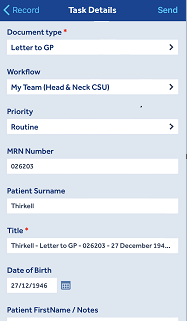
Select the required work flow, all the other boxes will be automatically filled in. You can add any notes and change/add to the title name if you wish.
Tap ‘Send’ again
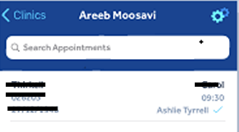
A tick will show next to your name, meaning the dictation has now been sent. It will now show in your Work in Progress folder.
How to create an adhoc letter
Step 1
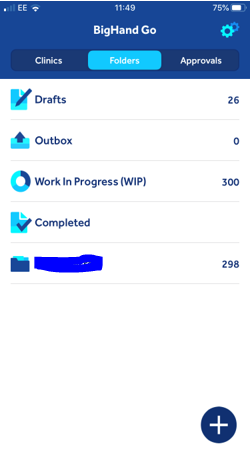
From the ‘Folders’ screen
Choose the + icon (bottom right)

Step 2
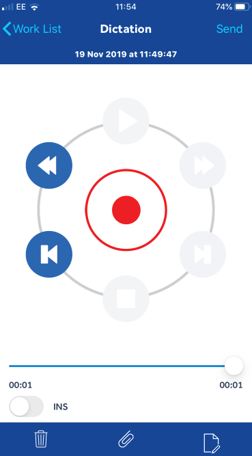
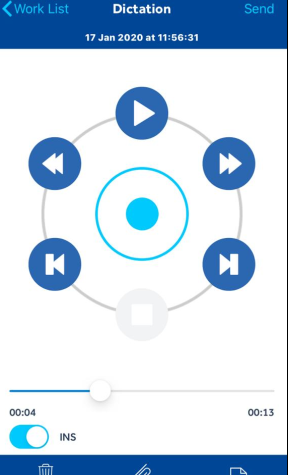
Start recording by tapping the red dot
Stop, rewind and fast forward can all be selected once the initial recording is created
There is the option to insert further recording to your dictation. Turn on the ‘INS’ button to activate ‘Insert Mode’. The red dot will change to blue, play your dictation from the beginning and stop where you wish to insert. Tap the blue dot to start recording and tap again to stop.
Tap ‘Send’
Step 3
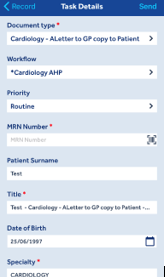
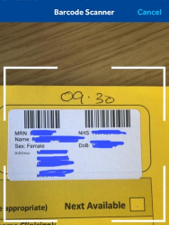
Choose the document type, workflow and priority. Ensure you fill in the MRN, name and DOB of the patient.
You may wish to use the barcode scanner if you have a patient label. Tap the barcode icon and hover your phone over the MRN barcode on the left side of the label (right side is NHS no.) Once the barcode is read, the MRN number will appear in the box.
You can add any notes and change/add to the title name if you wish.
Tap ‘Send’
The dictation will now appear in the ‘Work in Progress’ folder
